ECS Administrative Web UI
Login to the Web UI
The WebUI uses SSL and a self-signed certificate to help protect your
session from casual eves-dropping. Take the IP of your first ECS node,
fire up your browser, and point https:// at it. For this example,
the latest Google Chrome browser was used.
You cannot add, change, or remove administrative users in this build. Use the default below.
Username: rootPassword: ChangeMe
Input License
Open Settings, then Licensing and upload the license.xml file
located in the ecs-single-node / ecs-multi-node folder. The UI will
not automatically update the license view in this release. Navigating
away from page and returning will prompt it to update. You may need to
try a few times before it updates. Once it does, you should see
something like this:
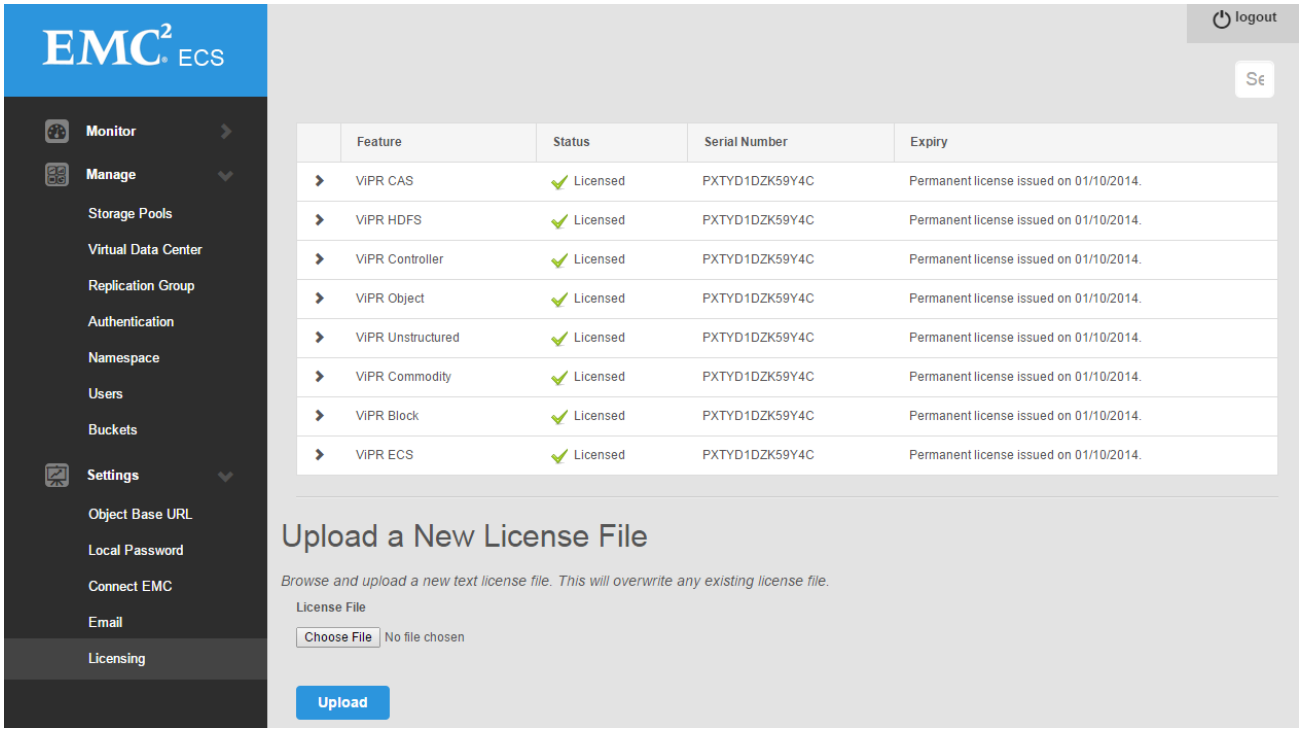
Upload License file
Create Storage vPool
Open Manage, then Storage Pools and create a storage pool. Keep the name simple, and add all nodes to the pool. Click Save.
There’s a known issue in this build that causes the Storage Pools view to appear frozen for about 1-2 minutes after provisioning begins. Unlike with the license view case, this view will update on its own. Once it’s updated, you should see something similar to:

Create Storage VPool
Create Virtual Data Center
Open Manage, then Virtual Data Center and create a Virtual Data Center using the below screenshot as a guide. Please wait for up to 20 minutes after creating a Storage vPool before creating a Virtual Data Center. There are several background tasks that must complete, and for object to fully initialize.
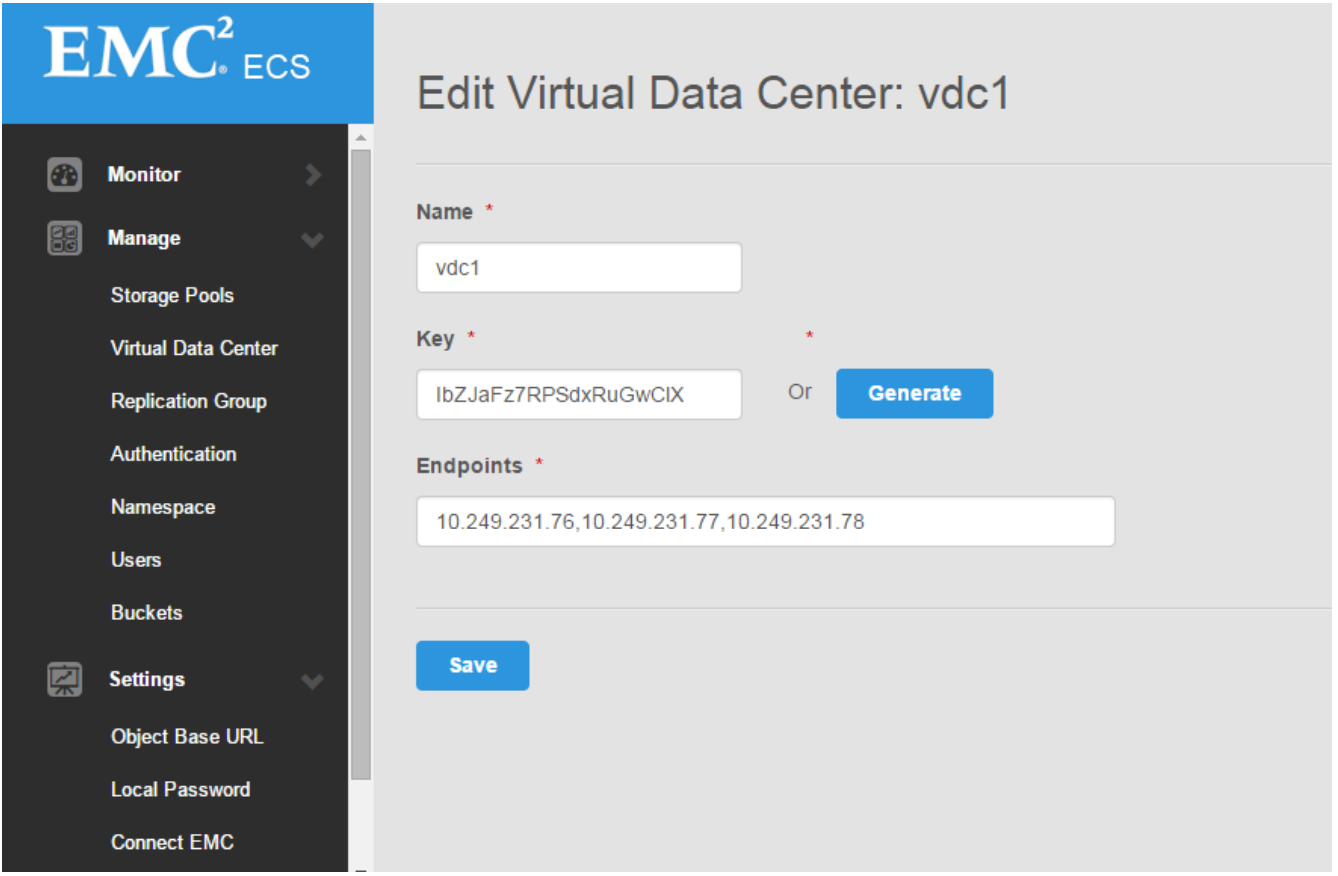
Create Virtual Data Center
Create Replication Group
Open Manage, then Replication Group and create a Replication Group using the below as an example. Currently only one VDC in a replication group is supported.
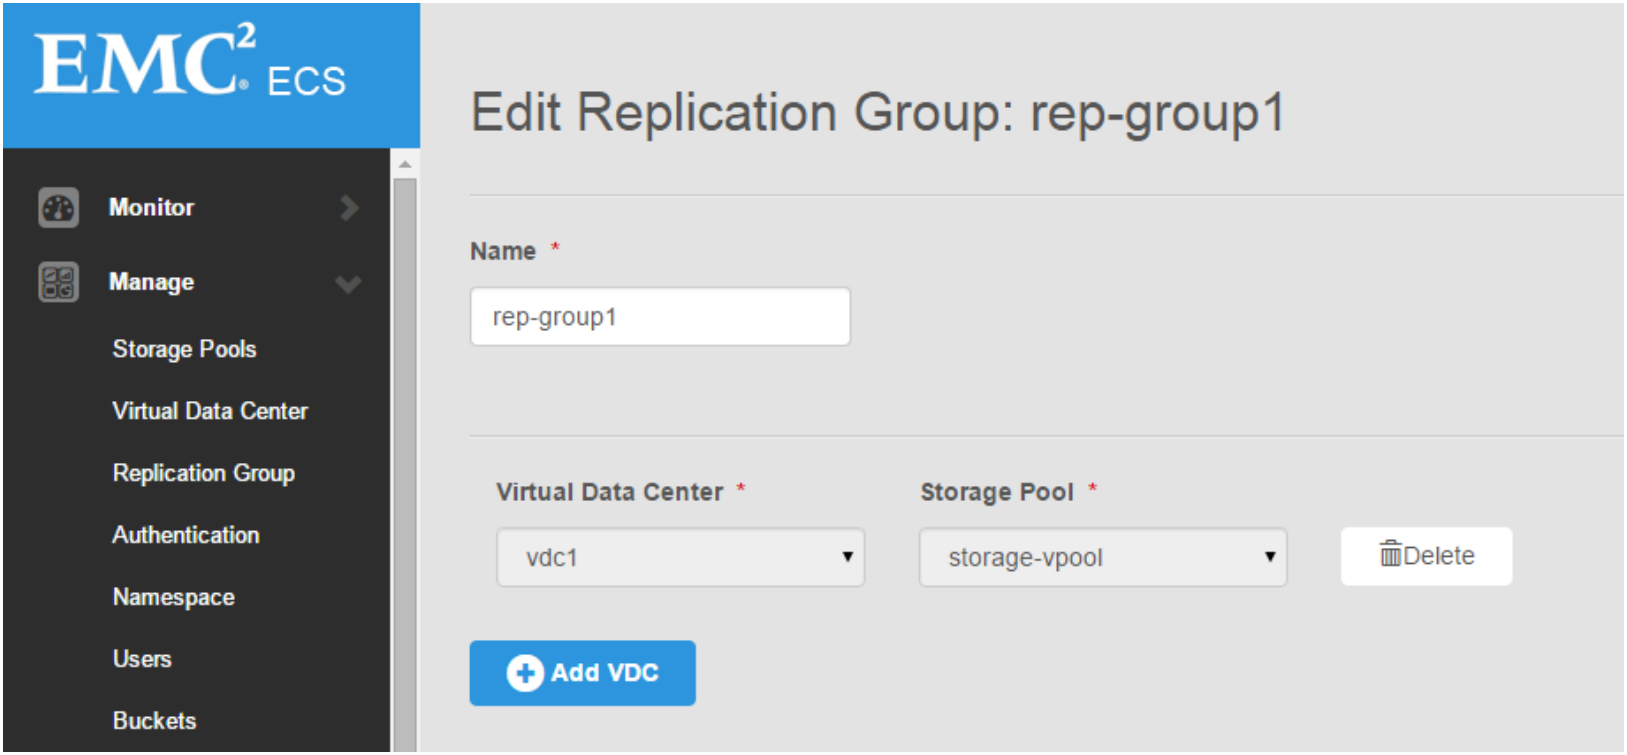
Create Replication Group
Create Namespace
Open Manage, then Namespace. Set up a Simple Namespace with a name such as “ns”. Input a namespace username to use with the namespace, such as “ecs_user”. Select the replication group for the namespace, and click Save at the very bottom.
Namespace features available in this release
✔ Simple Namespace
Retention Policies
Quotas
Authentication Domains

Create Namespace
Create Object User Account
Open Manage, then Users, then click on Object Users and New Object User to set up object store credentials.
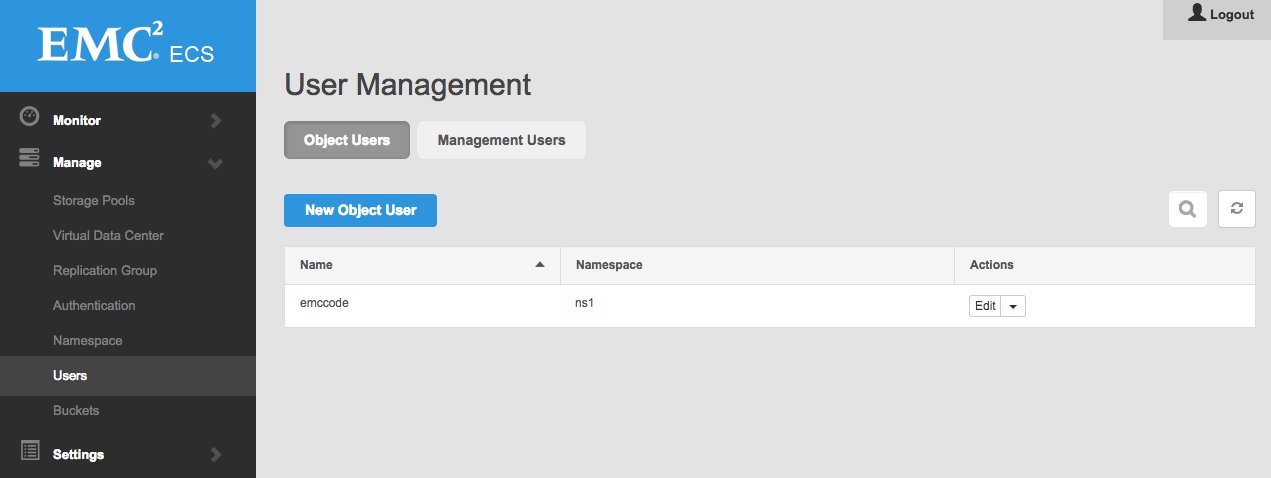
Create Namespace
Create secrets by filling the fields and clicking the buttons.
- S3 Key: Click Generate & Add Password to retrieve the server-generated key.
- Swift Password: Enter your own password and click Set Password.
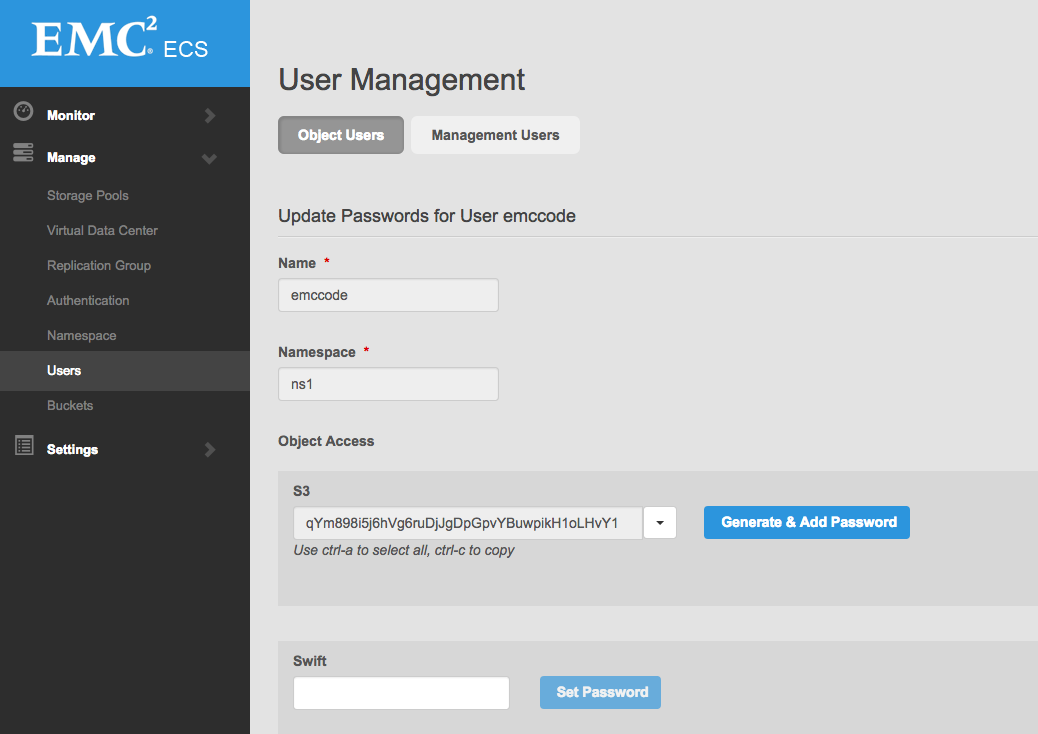
Create User S3 and Swift Keys